Mascots aren’t meant to hide out under the bleachers, and neither should your logo. A logo is your brand emblem, and it should have a prominent spot on all your business communications. The more you use your logo, the more you create a consistent image your clients will remember.
With that said, emails are the perfect place to spotlight your logo. If you send a lot of emails, imagine how many times a client sees your logo in a long email chain.
A custom signature with a logo takes your credibility up a notch and keeps your business top of mind. To make a statement with your messages, learn how to add a logo to your email signature on popular platforms.
How to add a logo to your Gmail signature
Method 1: Upload an image
- Have a logo image ready on your computer or in Google Drive. On Gmail, the easiest method is to upload an image and resize it in the interface.
- Navigate to the Gmail website, and select the account you want to make changes in. Open the Settings menu by clicking the cog icon in the upper right corner. In the General tab, scroll down to the Signature section. If the feature is currently disabled, activate it and choose the correct email account from the dropdown list.
- Update your signature or create one by adding text and links relating to your business. Think of your signature as a business card, where you can share contact details, job titles, and taglines.

- When you’re ready to add a logo, click the Insert Image button. The icon looks like a square framing a mountain silhouette. If the logo is on your computer, navigate to the folder where you stored your image, and select it. Otherwise, click the Google Drive tab and select your image from your stored files.
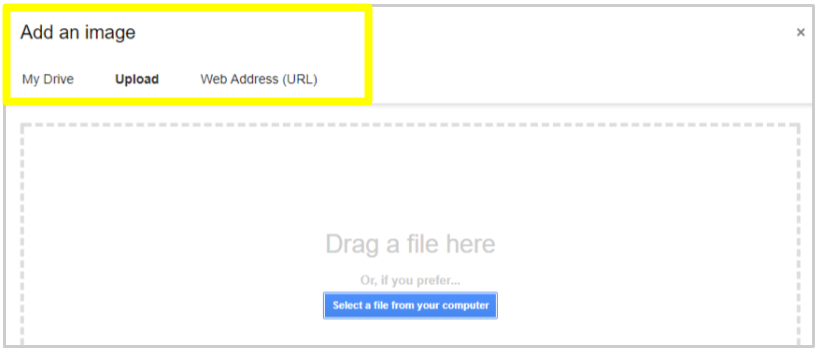
- Click on the uploaded image if you aren’t happy with the size. An option comes up to choose a small, medium, or large size. You can also switch back to the original size.
- Keep in mind, the logo will appear exactly where you position the cursor. Play around with the arrangement to decide if you want the logo beside, above, or below the text. When you’re finished, scroll to the bottom of the page and save your changes.
Method 2: Link to an image
- Copy the link to your image. If your logo image is stored on your web host server, you can link directly to the image URL. Follow steps 1 to 3 in the uploading method, then select the Insert Image button.
- From the Insert Image menu, select the Web Address (URL) tab. Paste the image URL in the provided box. A preview should appear, so you can make sure it’s the right image. If you’re satisfied, click Select to insert your logo.
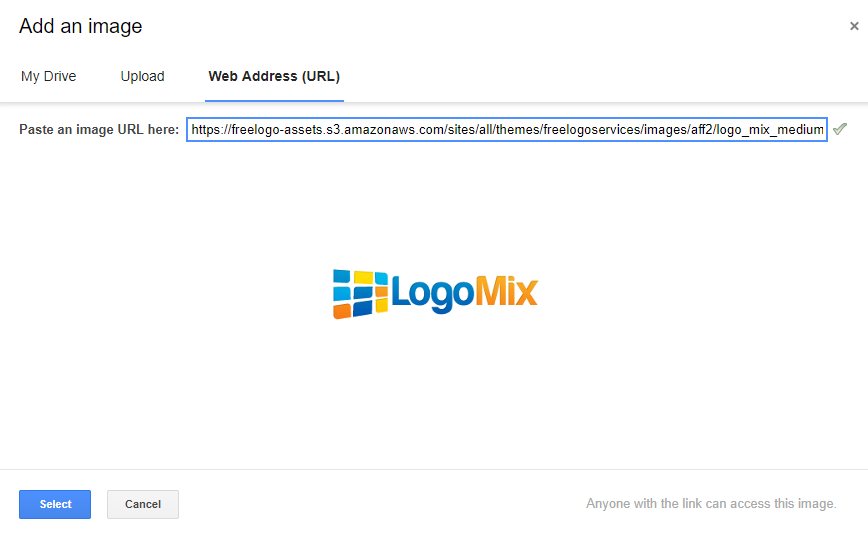
- From here, you can follow steps 5 and 6 from the previous method to resize and reposition your logo. If you like the finished signature, scroll to the bottom of the page to save the changes.
How to add a logo to your yahoo signature
- Prepare the image you want to use by uploading it to your website server or another photo storage platform. Open the image in your browser. In Yahoo, you can easily paste a logo image right into the Signature editor. Since you can’t resize your logo in the editor, it’s a good idea to create the exact image size you want to use.
- Log into your Yahoo mail account. In the upper right corner, select the cog icon and open the Settings menu. Click the Accounts tab on the left sidebar.
- Choose the right email account from the list of email addresses. Now, you should see several input fields, allowing you to edit your email details.
- Scroll down to the Signature section. If your signature is turned off, click the checkbox to append a new signature to your emails.
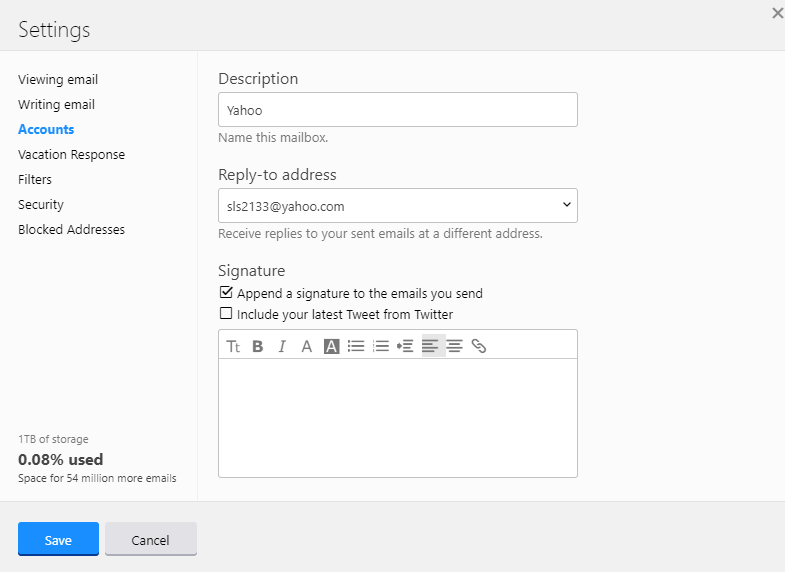
- Use the text editor to fill in any business information you want to include in your signature.
- Go the tab containing your image, and right-click on the image to get a drop-down menu. Copy the image.
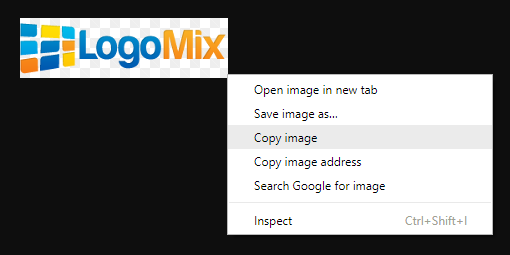
- Go back to the Yahoo tab, and position your cursor in the Signature editor. Press the shortcut keys Ctrl + V to paste the image into the box.
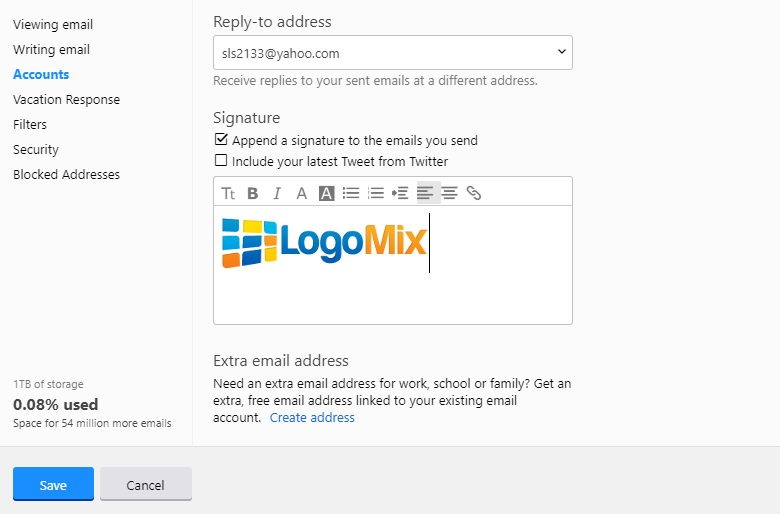
- Click the Save button in the bottom left corner to finalize your changes.
How to add a logo to your Outlook.com signature
- Upload your image online to your website server or whatever site you prefer for storing photos. Resize the file beforehand, as the image will appear exactly the same way in the signature.
- Log into your Outlook account online. Click the cog icon on the right-hand side of the toolbar, and select Settings. At first, you may see the Quick Settings menu. If so, scroll down to the bottom, and choose the option to view the full menu.
- Click on the Mail tab, and then choose the Personalization subtab. Now, you have the option to create or edit a signature. If the feature isn’t turned on, check the two boxes below the editor to automatically add a signature to new messages, replies, and forwards.
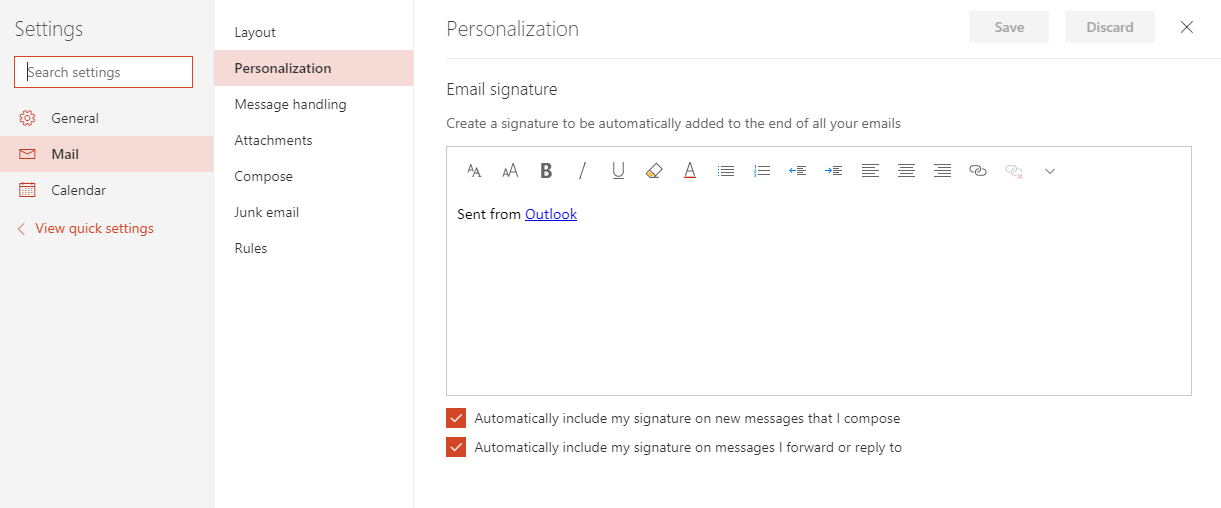
- Insert the texts or links you want in your signature. When you’re ready to add the logo, open your image in a new tab. Right-click on the image, and select Copy Image from the dropdown list.
- Go back to the Signature editor, and place your cursor where you want to insert the logo. Press Ctrl + V on your keyboard to paste the image. You can also right-click directly in the editor, and choose Paste from the drop-down menu.
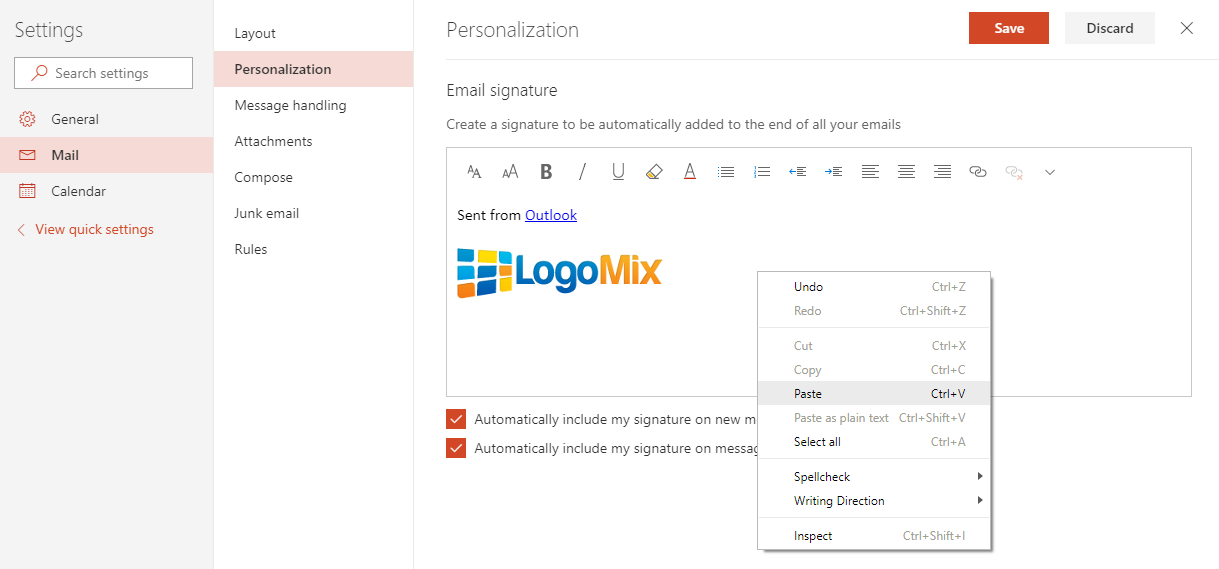
- You can shift your text and images around however you like to get your desired layout. When you’re finished, click the Save button in the upper right corner.
A custom signature is another opportunity to squeeze your branding and a call to action into every email. Clients see you as a serious professional, and prospective customers have a reason to learn more about you.
Pair your logo image with contact information and a great tagline or your blog URL, so readers are motivated to act.
Our free logo maker offers thousands of logo designs. Browse through to find the perfect one for your business!


