Countdown to WOW! Fresh Deals Unveiled Weekly for
Black Friday & Cyber Monday

View Deals
close

Logo

Add 30+ Characters to Logo Text
keyboard_arrow_right
Our apologies, unfortunately at this time our editing tool only allows for 30 characters per text box. However, after purchase we can add the additional text to your logo files upon request. Once you have purchased your logo, please contact us with the full text needed and we can get the revised files to you with in 1 business day.
Add Logo as URL for Email Signature
keyboard_arrow_right
In order to help you get the most out of your logo, we have looked for some step by step instructions for you below:

Click Here for Gmail Instructions

Let us know if you have additional questions!
Can I Delete a Logo?
keyboard_arrow_right

I regret to inform you at this time we do not offer the option to delete saved logo templates. We do provide the ability to create and save as many templates to your account as you would like. 

Can I Place a Copyright or TM Symbol on my Logo?
keyboard_arrow_right
Thank you for your inquiry about placing a copyright or trademark symbol on your logo. We cannot advise you on trademark rights in regards to your logo. Trademark rights are subject to applicable laws. This is true for placing a copyright symbol on your logo as well. For advice on such matters, we recommend that you consult a lawyer. Because of this, we cannot add a copyright or trademark symbol to your logo for you.
Can I place a watermark on my logo?
keyboard_arrow_right

We are unsure of the steps you would need to take in order to achieve a watermark of your logo. However, if you provide the detailed specifications we can provide the type of file you may need for the program.
Do I Own This Logo?
keyboard_arrow_right
I would be happy to provide more information in regards to your inquiry! When you purchase files with our company, you are given unlimited use of the logo files you've purchased. This means you may use your logo wherever you would like. The templates you've used remain on our website; your customized logo with unique font style, color selection, and object, text size, and position are what make your logo unique to you.
How do I download my logo files?
keyboard_arrow_right
Thank you for designing your logo with us! There are a couple of ways to download your new logo files to your computer.
 
The logo files are automatically downloaded to your computer upon purchase when you reach our thank you page. The files are downloaded to whatever default folder your computer is using for downloads. You may also have to “allow” your browser to initiate this download, so if you “blocked” downloads then the files would not have been downloaded. Most browsers are set up to automatically download to a “Downloads” or “temp” folder, but some will go to your Desktop.  Check your “Downloads” folder for a zipped file named after your company name. If you still can’t find the files, view the settings in your browser to check for or modify this default download location.
 
Check the email that you used to create your account. We send a confirmation email within an hour of your purchase, which has a link to download your logo files.
 
If you cannot locate the files in your “Downloads” folder, you can always download the logo files from our website at any time. To download from our website, follow the directions below.
 
1. Log in to your account on our website.
 
2. Go to the “My Projects” page via the drop down menu in the upper right hand corner on any page of our site (this should appear once you log in).
 
3. Locate the logo that you purchased on the left hand side of the page. You may need to scroll through your saved logo and product designs. The logo that you purchased will have a “Download All Logo Files.zip” link. Click on this link to download the zip folder of your logo files. The folder will download to whatever default folder your computer is using for downloads. For most browsers, this will be the “Downloads” folder. Check your “Downloads” folder for a zipped folder named after your company name.
 
Unzipping your files - Once you've downloaded your files, check for the zipped logo files folder on your desktop or in the “Downloads” folder on your computer. The .zip file will look like a folder with a zipper over it and will be named after your business name.
 
Mac users: Once you click on this folder, your files will automatically unzip and you should see a link at the bottom of your screen in the menu bar to access these files.
 
PC users: Select your zipped logo files folder If you are within the “Downloads” folder, click "Extract" from the top menu of the window, then choose "Extract All". If you do not see the "Extract" option, 'right-click' on the zipped folder. In the new menu, ‘left-click’ or choose “Extract All”.  
 
Next, enter where you would like the files to go. We've found that sending the files to your desktop is the easiest. Click "Extract" to send your files to the location you chose.
 
 
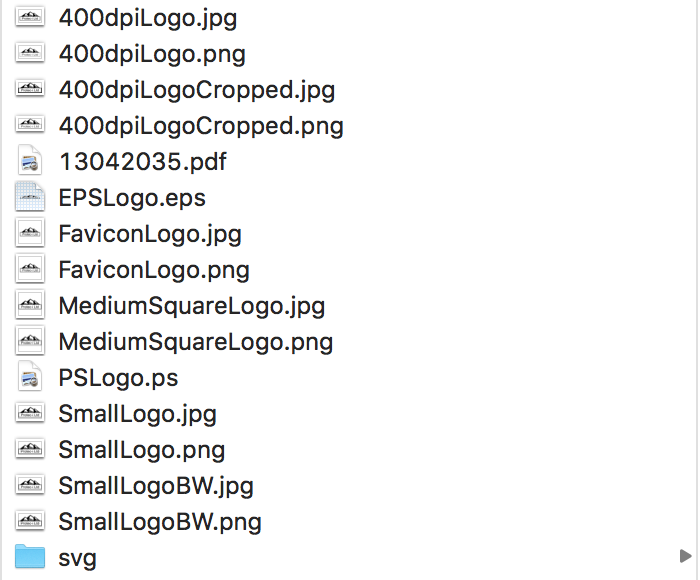
4. Using your files - You will now have 16 versions of your logo downloaded.
Different Logo Files Types You Can Download JPEG PNG PDF VECTOR
 
We've created a great video showing you the most effective ways to utilize all of your new logo files.
 
If you are short on time, here are the high-level differences between the included files:
 
PNG Files - PNGs are files that have a transparent background so that when you place your logo over a colored background, the colored background will show around your logo. These are best used in situations where you have a colored background you would like to show through, such as on websites, marketing materials, or promotional products.
 
JPG Files - Unlike PNG files, JPGs do not have a transparent background and will have a white background surrounding your logo. These are less commonly used than PNGs - only use when placing a logo on a white background.
 
EPS Files – EPS files should be used when working with a professional graphic designer or when specifically requested. They are considered the source file of your logo. These are not for everyday use.

Favicon -- this is an icon file created and able to be used on a websites browser bar or bookmark list to help further personalize your website design.

 
In addition, we have provided black and white ('BM' files), small ("SmallLogo"), medium square logo and 400dpi versions of your logo. When using your logo for printed materials be sure to use the 400dpi versions of your logo. Remember, JPG files will still have a white box around your logo and PNG files will have a transparent background.
 
For additional help with your logo files, contact customer service using our Support Form
 
Thank you again for you order. We're here to help you in any way that we can!
 
Italicize Fonts for Logo
keyboard_arrow_right

We only provide certain font styles for our logo templates. Since they cannot be italicized, I have attached a list of font styles we have not included on our site in this email. Please choose from the following font styles, or if you have a specific font in mind that you'd like to use and can provide the italic font style .TFF file, please include it in your responding email and we can change this on your logo for you.

Logo Changes After Purchase
keyboard_arrow_right

You can easily make changes to your logo at any time within 5 days of your purchase on your own from your account.

You can edit size, placement, color, and text. Please be aware that making changes to your logo will replace your current logo, not create a copy. Simply follow the instructions below, and you are on your way to a new and improved logo!

1. Log in to your account with us.

2. Go to the “My Projects” page via the drop down menu in the upper right hand corner on any page of our site (this should appear once you log in).

3. Locate the logo you would like to edit. Click the “Edit Logo” button below the desired logo. After clicking the “Edit Logo” button, you will be presented with a warning screen stating that all changes to be made to your logo will be permanent. This is simply stating that once you edit and save your logo, the edits you have made will now be part of the logo you have rather than creating a copy. The previous logo that you purchased will no longer be saved in your “Saved Logos” page. It will be replaced with your newly edited logo.

4. Once you have accepted the terms stated above (in step 3), you will be taken to our logo tool where the logo you wish to edit will load.

5. Edit your logo as desired.

6. When you are finished editing your logo to your liking, save your logo. You will be redirected back to your “My Projects” page, where you will be able to download your newly edited and saved logo files.

If it has been longer than 5 days from your logo purchase date, we offer to make changes to your logos colors, fonts/text, or move an object once after purchase for free.  After this one time change, you may be assessed a fee or required to purchase our unlimited changes package which allows for unlimited lifetime editing of your logo.  If you would like this one time complimentary change, please send us an email with a list of the specific changes you would like made including color code and font styles you would like to use, and we would be happy to complete your order.  


Please feel free to contact us if you have any further questions or concerns. Thank you for choosing us for your company branding needs!

Upload Your Facebook Files to Your Account
keyboard_arrow_right

Please see below for instructions on how to upload your Premium Logo Package Facebook files to your account. You must purchase the Premium Logo Package files to have access to the Facebook Cover/Profile files.

Tutorial: 
https://www.screencast.com/t/ovr5DtEgN7R0

Step 1: Choose your company page. To do so you will select the “Arrow” option from the top right-hand corner

Step 2: Click your company page under “Pages” located on the left side of the Facebook homepage.

Step 3: Click “Account” from the upper right corner of the page and select “Use Facebook as Page.”

Step 4: Click “Switch” next to the name of your company’s page.

Step 5: Place your mouse over your company’s profile image in the upper left corner of the page. An “Add Picture” link appears or “Change Picture” if you have an image uploaded already.

Step 6: Click the “Add Picture or Change Picture” link.

Step 7: Next select “Upload Photo”

Step 8: Choose the facebookprofile.png for the Profile image or facebookcover.png for the Cover Photo.

Step 9: For the profile option you can enlarge the logo or add filters. Once you have completed your edits you will select “Save”.

You now have your logo successfully on your Facebook Business Page. Please let us know if you have questions!